Saturday, February 18, 2012

Antique Low Boy Curvy Dressers

I picked up an antique children's bedroom set about a month ago that my mother found for sale in her neighborhood...THANKS MOM!!
She sent me the link to the add with pictures and I was SOLD!

From the pictures I couldn't tell that they were "child" size furniture, so when I went to pick them up I was a little disappointed. It's still a very cute and fun set to re-finish though!
 Two low boy curvy front dressers, each with their own mirror and a full size head board.

I am going to for SURE paint the head board....but the dressers I am sooooo torn!!


 I love the little key holes:-))))
 One of the mirrors.

I have striped, sanded, and re-stained the cabinet dresser. Let me just say this wood is just GORGEOUS!!

Amy from The Salvage Collection was kind enough to help me with some furniture questions and advice on this one!!  I can't thank her enough!
At first I really wanted to paint a two tone style on these dressers but I am now finding it very difficult to cover this birds eye maple up with paint!!

I found a couple paint colors that I fell in love with by Martha Stewart. I just might need to hold off on for now.....


Thursday, February 16, 2012

Up-Cycled Soap Dispensers { Patron Bottles }

I have been taking Patron bottles home with me from work for some time now because I think they are just to pretty to through away! I started using the Patron bottles for vases and I gave several to my mom. The bottles look really nice in a grouping and I have a stock pile for decorating for others parties and such.

I got to thinking....what else can I do with these??

Soap Dispenser!

Now, you can see in the second photo my mini Patron bottle with nothing painted on it and it's cute but I wanted a little more "something" to them.
This one is SOLD!
Vintage Labels!!!

So I am now hand painting vintage inspired soap labels on the bottles.
It takes a VERY STEADY hand to paint glass and even more so doing lines and letters.

On to the PUMPS!! I am very pleased with the pumps I found online from One Dream Design. They offer
 several different styles and finishes.
Image via OneDreamDesign.com

The two that I liked most and bought are "bronze bird head" pictured above and the "modern heavy duty flat head bronze" pictured below.
Image via OneDreamDesign.com

The pumps arrived in 3 days, supper sturdy, and large enough to go well with the size of the liquor bottles!
A friend of mine custom ordered a Jagermeister and a mini Smirnoff bottle one and the pumps just simply screwed right on!

Square Label


Bronze Bird Head Model from OneDreamDesign.com

Star Label


I just love everything about these!!

Circle Label


I will be doing a full tutorial on how I made these very soon!


Linking To:
Funky Junk's Sat Nite Special


Monday, February 6, 2012

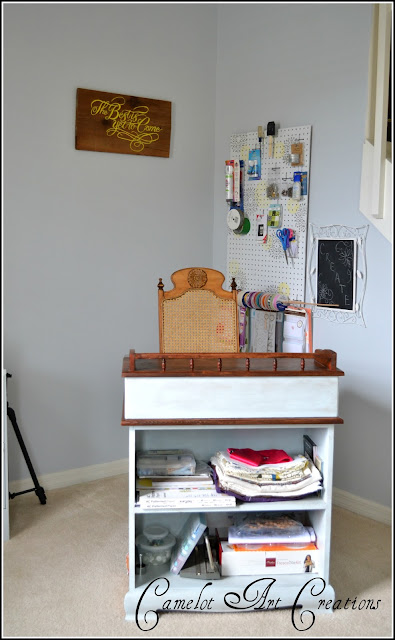
New Craft Room { Stenciled Peg Board }

I have had a couple of peg boards in my garage for some time now that a friend of mine gave me and after scoring a bunch of FREE craft stuff, having a good amount of stuff that I have collected over the past few years, and I am about to be receiving a couple of different sewing machines....it's time for my own craft space!


I pulled out that peg board from the garage and gave it a good coat of primer.

BEFORE


I used a "fine grade" sanding block first to "scuff up" the surface. Brush/wipe off all the dust and spray your primer.

You can buy peg board that comes white and this will save you a few steps...I used what I already had.

After my first coat of primer I did a light sand again with the "fine grade" sanding block to make sure I had a smooth surface to apply my paint to.

I used Rust-Oleum spray paint in White Semi Gloss. It was what I had in my garage from a previous project.
It did take two coats to get the right amount of coverage I wanted.

On to the stenciling...

In the past I have had a hard time stenciling properly. A few tips that I figured out while doing this.

1. use a foam brush
2. wipe off ALL excess paint
3. do a "pouncing/dabbing" motion over your stencil
4. after each section rub off the back side before laying down a new one

I have to say the MOST important thing I figured out was to NOT put to much paint on your FOAM BRUSH! Don't use a paint brush!

I let my grey areas dry and moved onto some yellow. Overlaying the grey with yellow.


I used a Semi Gloss sealer over the whole thing when I was done to help protect the paint job.

For the back side I glued four wooden blocks, one in each corner to get the peg board to stand off of the wall.


To hang it, I just looped some wire that I had through each side to make a "hanger" in the back

All done and hung up!!!


For now I have put my little writers desk in the room, not sure it will be staying.

I'm thinking of building an "L" shaped desk/shelving unit to go in that corner.


That's it for now....

Linking To:
{Primp}It's Overflowingshabby creek cottage


Follow Me On Instagram

amazon

Related Posts Plugin for WordPress, Blogger...