Showing posts with label DIY. Show all posts

Monday, August 12, 2019

How to Make Vintage Inspired Books

 I love decor catalogs and used to get so many for inspiration, Pottery Barn, Ballard Designs, Sarina & Lilly & so many more. Now that Pinterest has arrived 8 years ago, I don't feel the need for catalogs anymore. Speaking of Pinterest, I was looking for French inspired antique doors one day on Pinterest. When I came across the most beautiful antique doors that are on the Eloquence web site. I ordered their catalog and WOW!! It is filled with the most amazing French Country inspiration. I kept seeing these books in their furniture photos. I was INSPIRED to try and make some of my own.

NOTE: DO THIS DIY AT YOUR OWN RISK.

Tuesday, May 7, 2019

DIY Herb Painted Doormat

Who knew you could paint your own doormat? I sure never thought of that, so when Terri at Decorate & More With Tip asked me to join her painted door mat challenge I was excited to join! I love trying new things and this was right up my alley! There are 10 other bloggers joining this challenge that you can check out at the bottom of this post! So many different designs, there's definitely one to fit your style, or inspire your own design!


I have enough doormats, but I've been wanting one to go in front of our little patio bench. Keeping with "all thing plants" right now. I thought it would be fun to try a herb botanical design. It's hard to get a lot of detail in the painting on the mat, so it didn't really turn out exactly how I had envisioned. I still like it though!

This post contains affiliate links that I make a small commission from without any added cost to your product.

Tuesday, April 30, 2019

Crib Turned Patio Plant Wall Hanger

Every year when Spring arrives, I want to get outside and play in the yard! Our back patio has slowly been coming together as I add new décor and plants when I find good deals. We've been fortunate enough this year with cooler weather here in Florida, so we're enjoying sitting out back a little more. I'm hoping that doesn't mean we will be having an extremely hot summer! 

FB Marketplace is a great place to look for budget friendly décor for outside. I've actually picked up some things for free and this vintage crib is one of them! You can get 5 pieces of décor out of one crib! I hung the mattress spring on the wall inside our home and clipped family pictures to it. The side rails were perfect for a Plant Wall Hanging and the end rails will be used in our future garden as trellises.

This post contains affiliate links that I make a small commission from without any added cost to your product.

Monday, January 14, 2019

Lamp Turned Large Chunky Candle Holder

This is the year of use all the junk in my junk pile or get rid of it! I've had several "things" sitting around for when I feel inspired to get the project to done. I'm trying to not take on any new "things" until that junk pile gets a little smaller. I've actually donated a lot before and after Christmas but this lamp just kept saying NO, don't get rid of me! I can be great! I had planned on painting it as a lamp but we just don't have a use for it as a lamp.

The shape is what drew me in at a Garage sale for $3, three years ago. So I had an idea for it! Candleholder! Large chunky candleholders can be a bit pricey so I could never purchase one for $3 and the deconstruction began!

Tuesday, January 8, 2019

How to Make Valentines Rag Wreath

Happy 2019 friends! Hope everyone had a great holiday and New Year! Once the weekend before Christmas came I signed off of all social media and just enjoyed the time off with my family! Now it's the new year and I'm ready to start sharing everything Home & DIY again! With Valentines Day around the corner I thought it would be fun to use up some of my scrap fabric and lace that I have for a rag wreath! I'm trying to keep the feel of our home Wintery and adding a little pink. This will transition into Spring décor very easily too!


I like subtle Valentines décor and I usually just do one spot in my house like our buffet table or this cute little area by our entrance front door. I don't think I've ever really found Valentines décor in the store that I've liked so I always make something. This wreath cost a $1 to make for the metal wreath ring from the Dollar Tree!


Wednesday, November 14, 2018

How to Make Vinatge Christmas Stockings

I recently went searching for vintage Christmas stockings and couldn't find any at an affordable price! I found these Linen stockings on Amazon at a great price, four for $13.99!! That's about $3.50 each! The cuff is a little shinny but I was surprised by the fabric on the underside. It's a lighter linen color and by folding the cuff up it lengthened the stockings like the long vintage stockings! When I purchased these my intent was to cover the cuff with lace or pretty detailed fabric.

Thursday, November 1, 2018

How To Makeover A Bathroom For Under $200 - Part 1


I'm so excited to be sharing how we made over our boys bathroom for under $200! This bathroom makeover should have been done when we first moved in, 2 years ago! But, I'm glad we waited so I could come up with a better design plan than just painting the walls. I'm going to break this bathroom makeover post into a two or three part post since going into all of the details about installing some of products gets pretty lengthy. For this PART 1, I'm sharing the before and after pictures with the products we used. I'll be sharing the process with tips on installing the Peel and Stick Tiles and the Board & Batten in PART 2 and PART 3!

When I started planning this bathroom makeover I had planned on buying a new mirror (a gold one), spray painting the light fixture black and spray painting the faucet black. Once we finished installing the board & batten and painting , the brushed nickel finish didn't look as dated anymore and decided to leave it as is. I think brushed nickel is a timeless finish and changing everything to black will eventually go out of style. It saved us about $60-$120 too by leaving the black mirror.


Tuesday, September 25, 2018

French Country Nightstand Makeover with Fusion Mineral Paint

I really have a soft spot for furniture that has a lot of detail! I check Facebook Marketplace about 100 times a day looking for antique pieces at a good price. A good price to me is $20! 🤣 The most I've ever paid for a piece of furniture was $60. It was a buffet that was already painted HERE and felt that it was well worth the $60 considering the size of the piece. 
When I came across this gorgeous French nightstand listed for $50 I really wanted it! I messaged the seller offering $20 and he said no. About an hour later he messaged back saying if I came that day for it I could have it for $20! It was meant to be mine!❤


I used Fusion Mineral Paint in "Little Whale" for the body and "Casement" for the white details. Fusion Mineral Paint is my favorite paint for furniture! There is minimal prep work, the paint goes on supper smooth and there's a built in top coat, which means you don't have to apply a sealer over most projects. I'll be sharing a more detailed post about FMP products soon!

Affiliate links for product sources are included for your shopping convenience.

Friday, September 7, 2018

Falling For Autumn Tablescape Blog Hop

I have been so excited to put this Fall Tablescape together for months now! I've also joined some amazing blog friends at the end of this post to share their beautiful tablescapes as well, so I hope you'll go check them out after!
Last year I went with soft colors like blue, white and gray. This year I was feeling the deeper tones, but trying to keep it elegant. When I started planning this tablescape in my head the only thing I knew I wanted was wheat lining the center of the table, brass candle sticks and pears! I didn't know if I was going to use the pears for the centerpiece or the place settings though. I'll usually buy elements that I like and play with them until I come up with something that I like! I always say buy what you like & if it doesn't work you can return it. 


Friday, August 24, 2018

DIY Shabby Chic Fabric Pumpkins

Our two older boys are back in school and we were sad to see Summer go! I'm glad to have a little bit of a routine back in place though and it's back to hours of homework every night after school. haha
I know most people wait till September to start Fall décor but I needed something to get my creative ideas flowing again after our Summer break! A new season always brings inspiration and I always try to make something for each season every year. This way my little ones see and get to help as they grow up, as did my two older boys growing up.
I made a No Sew Fabric Pumpkins a few years back that can be found HERE but I wanted to make some shabby chic fabric pumpkins this year and doing a simple running stitch was easier than using a bunch of hot glue with two little ones!

Friday, August 10, 2018

DIY Fall Placemat Scroll Art


It's hard to believe Fall is almost here again! With our older boys returning to school on Monday it doesn't even feel like Summer anymore, besides the extremely hot weather! haha That being said my mind is all on Fall décor. I think it's easy to transition Summer décor into Fall by leaving some of the yellow flowers out and adding in some darker colors like Magnolia's and their dark leaves.  I usually stay on the neutral side but I'm adventuring out of my comfort zone this year & going a little darker!

Target has a ton of the Hearth & Hand line on sale right now and when I came across this pack of 10 ticking stripe placemats I immediately thought they would make the perfect Fall Scroll Art! They were only $3.49 and I found the Magnolia Stems on sale as well for $3.49 each! I pulled those off of the stem and hot glued them how I wanted them to lay flat ang then hot glued them to the door. I wouldn't recommend hot gluing to your walls but since this is a high gloss door I know I can just pull them off afterwards.


Sunday, June 17, 2018

How To Add A Vintage Touch To Your Pillowcases

We recently picked up new sheets for our bed and it came with four pillowcases. I thought to myself, so many plain pillowcases these will just sit in our linen closet! That gave me an idea to embellish two of the pillowcases. I LOVE lace and ruffles and since I have a TON of lace from my husbands grandmother, I decided to use that. 

This was an easy and inexpensive project. I would still like to add some ruffles to the other two pillowcases and make them more fluffy!


Friday, May 4, 2018

DIY Botanical Art

Art can be very expensive especially when you need multiples! I love botanical prints and they can be hard to find and sometimes when you find them they can be a bit pricey. I searched Pinterest for free downloadable prints and found Lauren's at Bless'er House. I absolutely LOVE these six prints and if you want to download them you can head over to her blog and subscribe to get the free download!


Friday, April 27, 2018

Faux Marble Countertop {Part One}

I was scrolling through Instagram one day and happened to see a post by Instant Granite with vinyl coverings for countertops that look like marble & granite! I recently finished painting our cabinets and giving our kitchen a mini makeover but the dated yellow laminate countertops just made the space feel incomplete. After watching several videos online I was ready to give it try! Anything was better than the cream yellow! 
Instant Granite was amazing to work with and I received the material within a week of giving them my kitchen measurements!


Here is what the countertops looked like before. I did this project in the evening when our little ones were sleeping so the during pictures aren't the best. A lot of our big projects are done in the evenings around here!  

I'll be doing another blog post with more details on the painted cabinets and ways to update a kitchen on a budget!


Wednesday, February 7, 2018

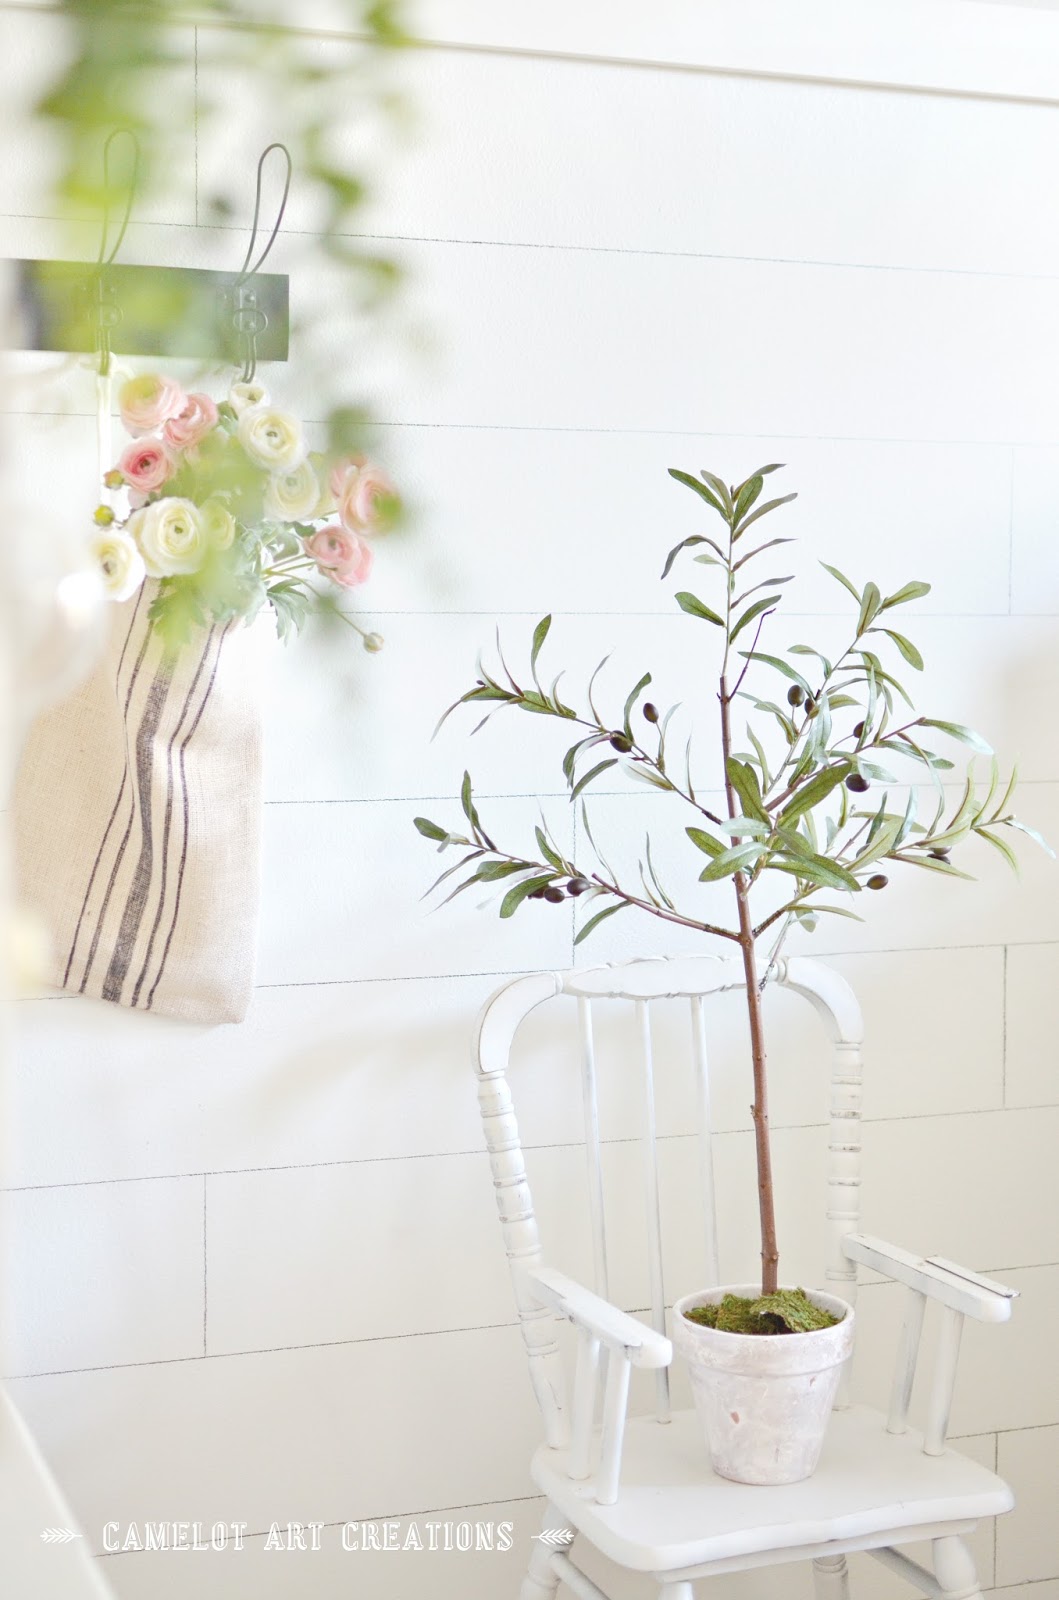
DIY Faux Olive Tree

Olive trees add such a nice farmhouse feel to a space but holy cow are they expensive! I was trying to find some for like $20 and I just couldn't find any that I liked under $80! While I was walking the greenery isle at Hobby Lobby a large olive bundle popped out at me because the stems on it were longer than ones I've seen in the small bundles. Everything was 50% off, so even better! It cost $6.50 to make this Faux Olive Tree Topiary! I already had the pot, it is from Old Time Pottery for $1.99 I believe. They have great prices on terracotta pots but I've seen real looking antique ones too at Hobby Lobby with the aging and patina on them!  


This is the olive bush I picked up from Hobby Lobby for 50%off.


I started out with finding a branch outside with stems on the ends and removed all of the leaves. The real tree branch really helps give the look of a live tree! If there are any extra branches on lower part of the stick go ahead and cut those off too leaving just the branches at the top of the stick.


I drilled a very small hole right above the branches. I cut the branches off of the faux olive bush and since they are a wired faux plant you can just push the wire stem into the little pre drilled hole above the branch.


I wrapped floral wire around the stem and olive branch to hold them in place. At this point you could probably use some moss to cover the wire up or just use hot glue at the base as you push the olive stem into the "tree trunk." You can see on one of the olive stems there wasn't a branch to wire to so I just drilled a hole and hot glued the stem into to the tree branch. 


For the top of the tree, I drilled a hole and hot glued the top olive stem into place.


The Dollar Tree sells packs of 5 green foam for $1 and I just stacked two and cut one in half to fill the sides and hold the tree branch in place inside the pot.


I had some sheets of moss leftover from another project and I just used that to cover the green foam but if was to go buy something I would use the loose moss and hot glue it to the green foam to cover it up.


Although there are some things that I would add to the next DIY'ed Olive Tree I'm happy with this one using stuff that I already had on hand!


Sunday, January 14, 2018

China Cabinet Makeover

A good makeover never gets old! We recently inherited my husbands Grandmother's china cabinet and dining room table with chairs. I haven't decided what color to refinish the table set in yet but I knew exactly how I wanted to redo the china cabinet! The before is really heavy and dark looking. If you haven't used Fusion Mineral Paint, you should! It has become my go to paint! Easy to use, great color selection, no priming necessary and it has a top coat built into the paint, so you don't have to seal it! One less step is always a good thing. I do recommend on higher traffic pieces you might want to add wax or a poly. 

I was planning on priming the hutch first since the wood is so dark and I was afraid of the wood bleeding through but I took a chance and painted a section to see if it was going to bleed through the paint. Nope! I wanted a chippy look to it and since the finish on the hutch was shinny/slick when I started sanding it the paint came off in larger sections & I LOVE it!


This is the before. Dark and heavy looking but has good bones!


I used Fusion Mineral Paint in Champlain for the body and Rust-Oleum in Serenity Blue for the back wall.


It took 3 coats to cover completely and I started sanding it a couple hours after the paint dried so it would be easier to sand in a chippy look. I used a coarse grade, 120 grit sanding disk since already have a lot of them for my sander. Using pressure with one finger in the areas I wanted to chip away. After you have your desired look, go over it with a fine (220 grit) sanding block to get a smooth finish. 


Zibra Paint Brush's makes a round spindle brush that was perfect for the little window panes. It hugs all of the edges and covers in two stokes!


To keep with the rustic feel of this makeover I decided to do a very soft dry brush over the blue with the same color of the body of the china cabinet. You can see the difference in the top photo. The upper shelf area doesn't have the dry brush or distressing.


I painted over the hinges and distressed them. It gives a soft look with the hardware just blending in with the piece. 


I couldn't be any happier with this makeover! I'm on the hunt for an affordable chandelier and rug now! I'm thinking I want to go with a natural wood toned chandelier. Onto the next makeover!


Linking To:


Follow Me On Instagram

amazon

Related Posts Plugin for WordPress, Blogger...