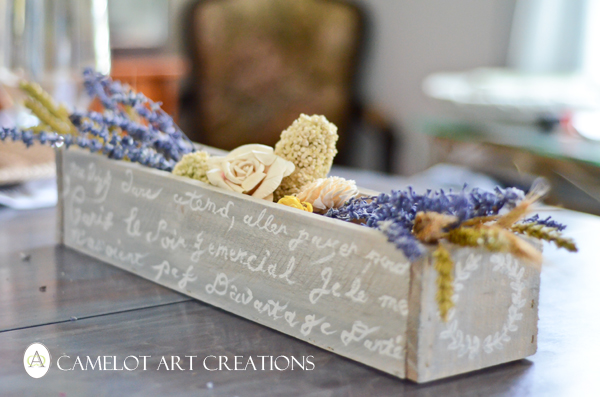
You will need four planks, one being for the end pieces. I already had pallet wood cut down and in my scrap pile so I don't have any pictures of that part.
Depending on the pallet and difficulty to take apart, I will just use my jig saw and cut planks out. Some of the pallets are easier to take apart in "whole" planks.
This took me all of 10-15 min. to build!!
Not including pallet disassembling time:)
Most of my pieces are about the same size, but as you can see it was off by about 1/4 inch. Mark it and cut your three pieces to the same length.
Keep one plank flat and bring the two side planks up.
It will look like this at the end.
At this point it was hard for my to take pictures, hold the box, and hold the nail gun:)
But you will just nail the side plank to the bottom piece on both sides. Once you get about two staples in one corner you can move the side plank to line up with the bottom one as best as possible as your nailing your way down.
Once you have both sides done, nail/staple your end pieces on.
You can than paint or leave it natural. I chose to paint mine!


Oh, I love it!! I have been wanting a flower box, and this is perfect. I love the painted script. That makes it so unique. Thank you so much for sharing the great tutorial. :) Have a great weekend.
ReplyDeleteI love your box with the hand painting on it! My very favorite thing is to make boxes and crates, I have about 6 posts coming up of crates and boxes I've made, stop by... I have a driftwood one up right now.... I really love yours, great inspiration! I'm a new follower.
ReplyDeleteSusan
So cute and so easy to make! To think I have all those pallets wasting away on the side of my yard. I had just about had it with pallets and was ready to put them on freecycle. You changed my mind! Pinning this next ;)
ReplyDeleteLove this idea! Come link up to centerpiece Wednesday and share your idea with us!
ReplyDeleteKarin
Thank you so much for sharing, I am featuring this today, starts at 5:00 EST. Thanks!
ReplyDeleteVery beautiful, I love it, thanks for sharing the tutorial, I think I will try it.
ReplyDeleteThis is so cute! I love it!
ReplyDeleteThis is so cute! I love it!
ReplyDeleteThis is a really awesome blog!! Excited I found it :) Newest follower! This turned out soooo cute
ReplyDeletehttp://abpetite.blogspot.com/
At where I used to work, we used to receive some freight on old HEAVY oak pallets that we didn't want to re-use because of the weight of them. I asked if I could have them and was pleased when he said "Knock yourself out!" So I took them home, cut out the pieces between the supports and planed them all. Thickness varies just a little but that doesn't matter. I think it would add to the character of the boxes I'd planned to make.... eventually! Seeing your post on those little planters has inspired me to "Get-R-Done". That oak has a wonderful grain and is tough too and should last for a long time. I'm a DIY'er too and can't wait to start on 'em. Thanks for the inspiration!
ReplyDeleteHi Desiree,
ReplyDeleteFound your awesome project from Earth911's post by Mary. Now following your blog! You have some great tutorials on reusing material.
Doreen
http://altered-artworks.blogspot.com
Lovely and easy making, I love your DIY making.
ReplyDelete