Showing posts with label hand painted. Show all posts

Wednesday, June 28, 2017

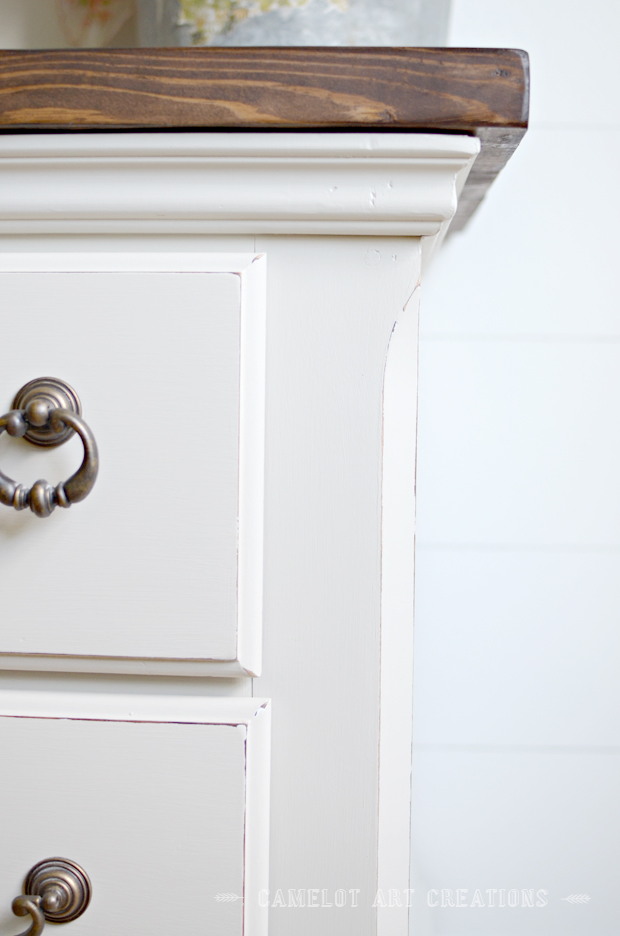
Night Stand Makeover

This table was the bottom half of an armoire that wasn't going to be used anymore. The owner needed a large night stand to fit with the scale of the large bed. I added 2"x6" planks to the top to cover the large hole and refinished it in Fusion Mineral Paint Champlain. The top is stained in Dark Roast by Minwax. 


It turned out perfectly!


Thursday, April 13, 2017

Dresser Refinished with Fusion Mineral Paint

I love trying new paint products. There are so many different brands and they just seem to get better and better as time goes on. When I started painting furniture 6-7 years ago, you had sand and prime furniture. Although I still have to do that with some pieces, paint has come a long ways in the last 7 years. I decided to go with Fusion Mineral Paint for this bedroom set. I've been following their Instagram page and a few other furniture experts that use the paint and was loving what I was seeing!!

You don't need to sand or prime and it's self sealing so, you don't need to wax or seal it. That being said, on this set I'm refinishing it has several knots in the wood. I've learned my lesson with knots and went ahead and primed this dresser to play it safe with bleeding in the future. I did clean the whole dresser first with TSP and gave it a light sand by hand to rough up the surface a little. 


dresser makeover

This color is Champlain and it is the perfect creamy white.

The packaging just makes you want to paint the day away!!! "Paint is good for the soul" does it get any better than that? Ummm, NO!
This paint was NOT a disappointment! So smooth and easy to use. 


dresser makeover

I went with light distressing on the edges. 

dresser makeover

dresser makeover

dresser makeover

dresser makeover


dresser makeover

What the before looked like. I still have the headboard and foot board to finish plus a night stand.


Thursday, April 6, 2017

Hand Painted Eggs

Easter is right around the corner and I can't seem to get enough of floral patterns right now. Stores only carry colorful eggs or bright colored eggs. So, I thought may as well paint some of my own! Stores carry these faux eggs for crafting and they are just perfect for this craft! 

painted egg

painted egg

I started out by painting a few in a soft purple and soft pink. Giving me a mix of white, purple and pink.
Next, I did a few with green vines and some with large flowers. A tip when painting, I always dip my brush into two color. I try to two similar colors, one light and one dark. When you go to paint after picking up two colors onto your brush, you will get a nice depth to what you paint. I just did a swooping motion, staying in one area and creating 4-5 swoops all in a ball to create the flowers. Went back and did some white details to highlight some petals, gave each flower a center and leaves.

For the vines, I just did several green squiggles and dabbed tree dots in a circle creating a flower. Go back and give each one a center and add some flower buds in there with a half dot.

Painting is so soothing! It's not difficult and if you were uncomfortable trying to free hand it, use stencils.


painted egg

painted egg

painted egg

painted egg

painted egg

painted egg

I tried a few different other ideas for use. I decided on making a center piece for the table.

I have included affiliate links in this post for your convenience.


painted egg

painted egg

painted egg

painted egg

painted egg

painted egg
I've included a link below to the Lavender stems I used in the vase on the center piece. They are so REAL looking!!


Tuesday, June 9, 2015

Upcycled Drawer to Shadow Box


 It's a little hard for me to toss solid wood items!
 
My boys were ready for a room makeover and it was time to toss their desk. I tried selling it for a small price and - NOTHING!
 
Which turned out to be a good thing. Before kicking the ugly little wood desk to the curb, I saw new life in the drawers!


What they looked like when I propped them up. I have three of them and have only redone one of them.


First I painted it all white except for the bottom part. I re-stained the bottom board.
I used Mod Podge to place some pretty left over napkins to the back wall. 


I have two more drawers to do and plan on hanging them together on the wall.


Linking To:
Savvy Southern Style 

http://www.frommyfrontporchtoyours.com/2015/09/treasure-hunt-thursday-219-highlights.html

Follow Me On Instagram

amazon

Related Posts Plugin for WordPress, Blogger...